Specific vendor invoices can be selected for payment in BIS ®, and the amount to pay specified for each one. Those invoices and payment amounts are placed on a prepayment list. Once an invoice is on the prepayment list, it is ready for a check to be printed and can no longer be modified. As long as an invoice is place on hold, it cannot be selected for payment.
Selecting Invoices for Payment
Invoices can be selected for payment based on the following criteria:
- Job Number: This selection criterion chooses only those invoices associated with the specified job, but this can be combined with vendor ID, Invoice Number, and/or the Due Date. If the selection criterion is used, the job amount will show, and the amount to pay will be limited to the job amount.
- Vendor ID: This selection criterion chooses only invoices for the selected vendor, but this can be combined with the Job Number, the Invoice Number, and/or the Due Date.
- Invoice Number: This selection criterion chooses only the invoice assigned that number, but this can be combined with the Job Number, Vendor Id, and/or Due Date.
- Due Date: This selection criterion chooses only invoices with the specified due date, but this can be combined with the Job Number, Vendor Id, and/or Invoice Number.
To select invoices for payment:
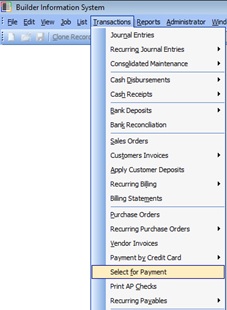
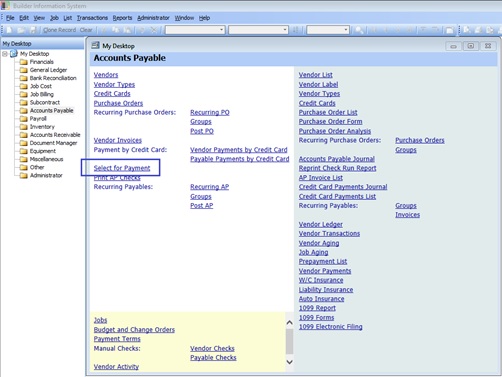
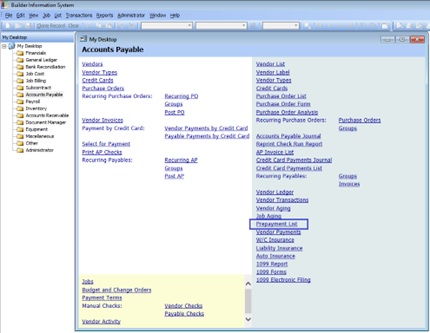
- Choose Select for Payment from the Transactions menu or by clicking the link in the white area on the My Desktop Accounts Payable screen:
- Enter the date to appear on the check(s). Only invoices with an invoice date prior to the check date can be selected for payment.
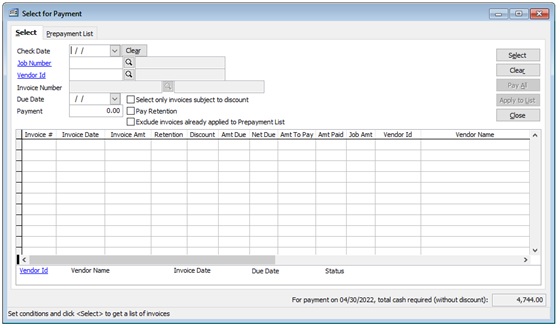
3. Fill in one or more of the categories mentioned above in order to view invoices that meet those criteria. Entering more than one category will narrow the search to those invoices that meet BOTH criteria.
4. In the Payment field, enter the total payment to be applied at this time. If the Pay Retention option is marked, BIS ® will distribute the payment amount to include payment for the retention.
5. Click the Select button. All outstanding invoices that meet the parameters defined will appear on the table. The payment amount will be distributed to invoices, beginning with the oldest one.
6. Review the Amount to Pay for each invoice. These amounts may be adjusted but cannot exceed the amount due. To see detailed information on a line item, double-click on the Amount to Pay field for that item to open the Invoice Detail screen.
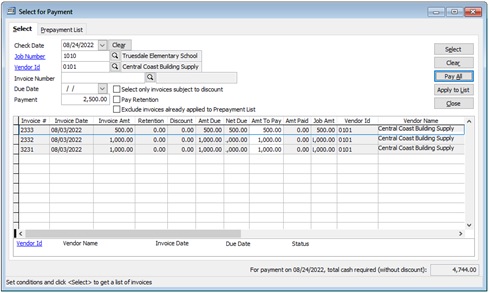
7. Click Apply to List. The invoices that have payment amounts entered for them will be placed on the Prepayment List tab.
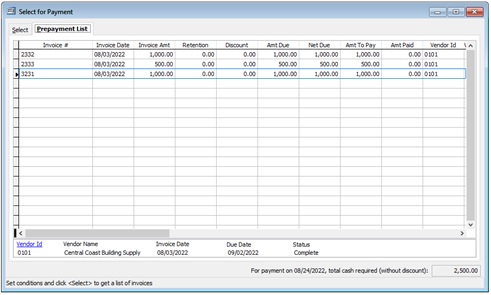
Once all invoices have been selected and applied to the Prepayment List, the Prepayment List report may be previewed/printed for review and to memorialize the process for your records prior to printing AP Checks and posting to the General Ledger to complete the process.
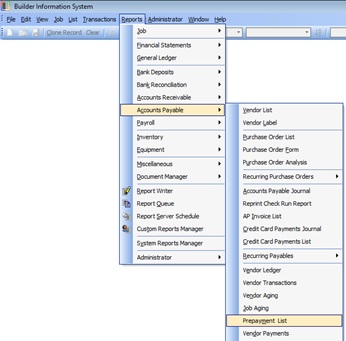
To query the Prepayment List, go to Accounts Payable, Prepayment List in the Reports menu.
Or select the Prepayment List link in the blue area on the My Desktop Accounts Payable screen.
To complete the process, access the Print AP Checks form and proceed with that process, (See document on Print AP Checks.)
