This option prints accounts payable checks for invoices that have been selected for payment using Select for Payment form. Note that this form is not accessible while the Select for Payment form is simultaneously open. Multiple invoices for the same vendor are combined into one payment; only one check is printed per vendor. Once checks are printed and posted to the general ledger, the prepayment list is cleared of entries and the appropriate accounts are automatically updated for the checks printed. If printing is interrupted, the system will only reflect those checks actually printed.
Also note: There is an AP Direct Deposit option now available in BIS which is capable of creating an AP direct deposit file in lieu of printing AP checks; that process will be covered in a separate information bulletin.
Once invoices have been selected for payment, the checks for those invoices can be printed using Print AP Checks form process. Please read this section carefully before attempting to print checks. Again, only one check is printed per vendor, combining all invoices payments for that vendor. Once checks are printed and posted, the Prepayment List in Select for Payment is cleared and the Accounts Payable Journal, Vendor Ledgers, Cash Disbursements Journal, 1099 Files, Job Cost Files, Subcontract Files and Financial Statements are automatically updated for the checks printed.
*If printing is interrupted, the system will only reflect those checks actually printed. When accounts are updated, BIS ® creates records in the Payable Checks file for the printed checks. These checks can also be voided if necessary.
Printing Accounts Payable Checks
To print accounts payable checks:
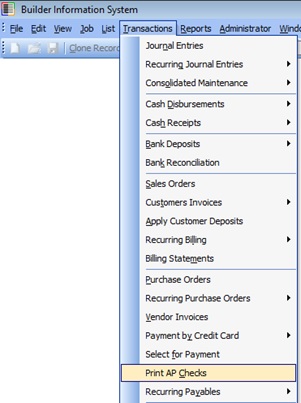
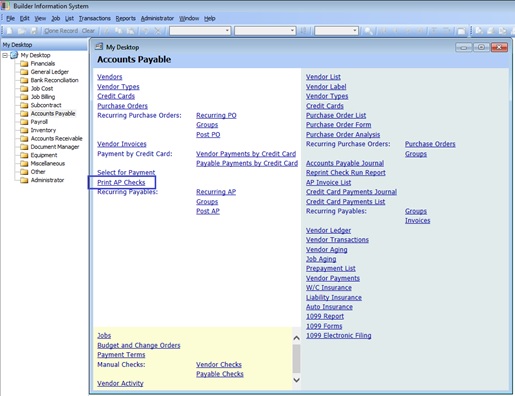
- Once the Select for Payment process has been completed and the form is closed, select Print AP Checks from the Transactions menu or from the white area on the My Desktop, Accounts Payable screen.


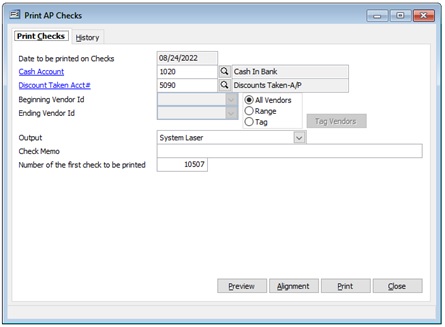
2. The date to be printed on the checks is for display only and is the date entered in the Select for Payment form.

3. Verify that the cash account and the discount account shown are correct.
4. Select the printer “Output” from the drop-down list System Laser, System Continuous, etc., depending upon the type of checks and printer being used.
5. Verify that the check number for the first check is correct. Multiple checks will be printed with consecutive numbers.
6. Available Vendor ID selection options are provided which include “All Vendors”, a “Range” function and a “Tag” function which will allow for selecting non-concurrent vendors that are in the Prepayment List, if needed.
6. Use the Alignment button to conduct a print alignment test, if necessary. After aligning the checks, click Print.
7. After checks are printed, review each check to verify that it printed correctly. If not, BIS ® allows reprinting the checks before continuing.
8. When all checks have been printed correctly, click OK to the corresponding prompt post checks and update accounts.
