BIS® provides the option to import payroll information from a .CSV file generated by About Time® time card software. The CSV (Comma Separated Value) should include the Employee Code, Job Code, Cost Code, Hours Type (Regular/Overtime/Double time), Date, and Hours.
Fig. 1
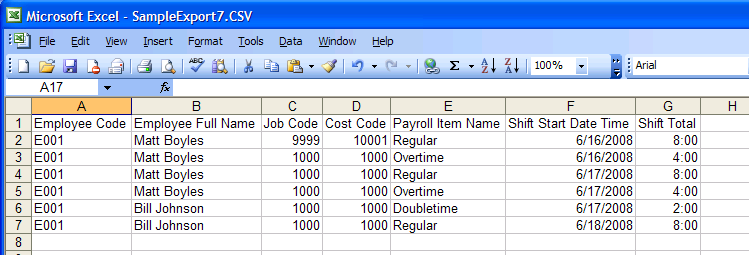
Note: Other information needed for the payroll record (Employee name, GL Account, Job name, Cost Code Description, Work Comp State, Work Comp Classification) will be automatically pulled from the master records in BIS®.
Notice in the example above that Employee Code E001 shows the wrong Employee Name (Matt Boyles) for the first 4 lines in Column B but is correct in the last 2 lines (Bill Johnson). This will be automatically corrected when the information is pulled from the Employee master record.
The first line also shows incorrect information for the Job Code and Cost Code. The steps to edit those fields will be explained in other screenshots later in this document.
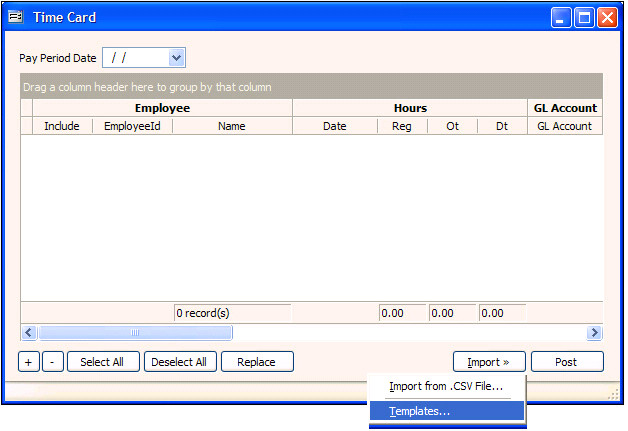
Select “Time Card” from either the My Desktop Payroll screen or from the Transactions menu. To create an Import from .CSV template, click on the “Import” button and select “Templates”.
Fig. 2
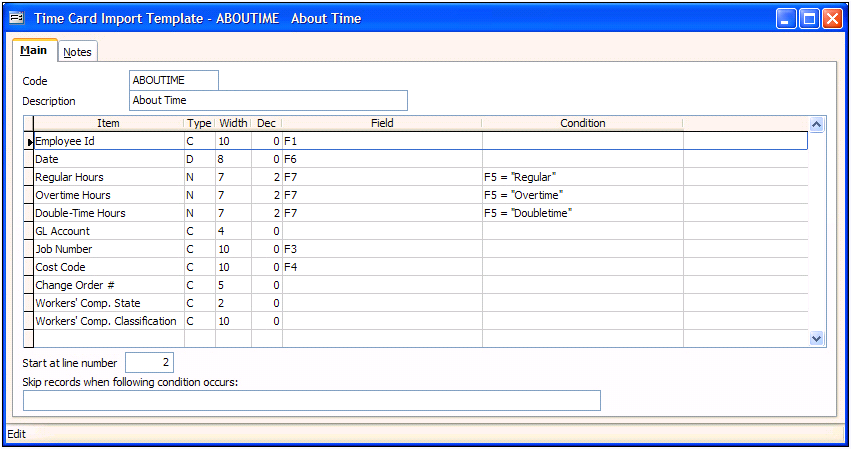
Use Figure 1 to determine the Field and Conditions for the template. The CSV Columns A – G are referenced as fields F1 – F7. Please note that the Condition column of the template is case sensitive. Example: Use “Regular”, not “REGULAR”.
Also, the CSV shows the record titles on Line 1 and the actual data starting on Line 2. At the bottom of the template enter the number 2 to indicate where the data begins.
Fig. 3
When the template is ready select the Import button again and choose “Import from .CSV File”.
Fig. 4

Use the Template drop-down arrow to select the new template; then Browse to find the CSV file. Use the “Append” or “Overwrite” settings to add new records to an existing Time Card or to replace the existing Time Card with a new one.
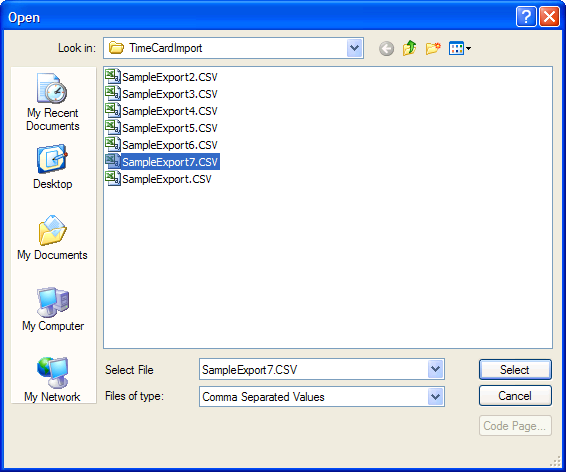
Fig. 5
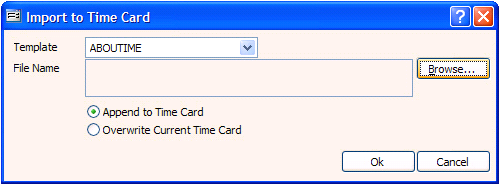
Fig. 6
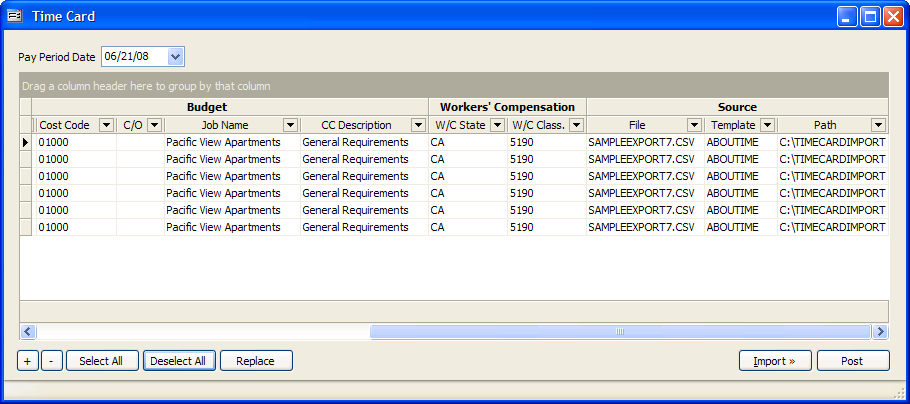
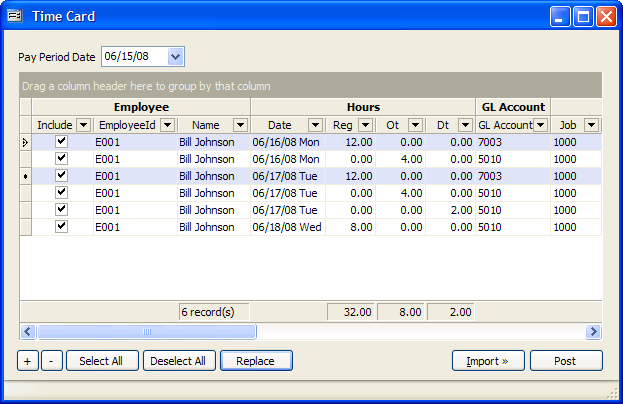
A successful import will show all lines with the correct information as shown below.
Fig. 7a
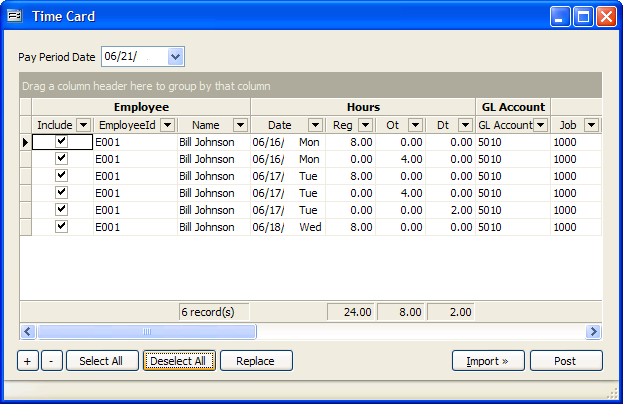
Fig. 7b (continued)
Select the “Post” button to load the records into the PR Hrs & Adj. form.
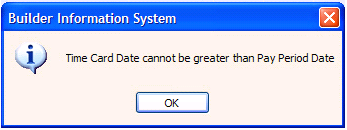
If an item is found to be invalid a pop-up message will appear after you select the “Post” button giving you specifics of what needs to be corrected.
Fig. 8
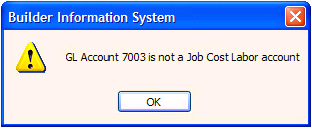
Fig. 9
The CSV file can be edited after it has been imported into the Time Card form. Select specific lines or use the “Select All” button if applicable, then select the “Replace” button.
Fig. 10
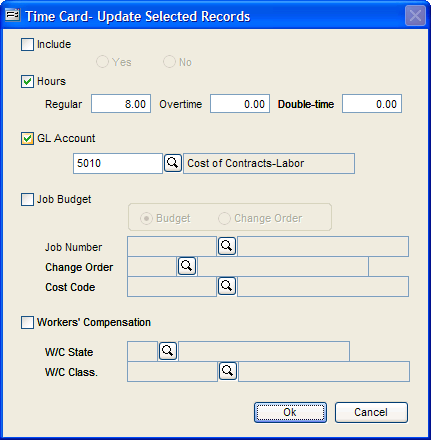
Select the checkbox for the items you need to edit. This will change the field from inactive to active and allow you to modify the selected lines. Select OK and try the “Post” button again.
Fig. 11
When the Time Card is imported into the PR Hrs & Adj. form it can be further edited or saved for printing the Prepayment List or Print PR Checks.
