Customer Payments are typically applied to one or more Contract Invoices generated using the Application for Payment process, or created manually using the Contract Invoices form, or to the Sales Invoices.
Important Note: If the payment amount is more than what the customer currently owes, the payment MUST be entered as a Customer Deposit. A Customer Deposit will properly account for the “overage” which is held in a Deposit account and may be applied later or allow a Customer Refund to be administered.
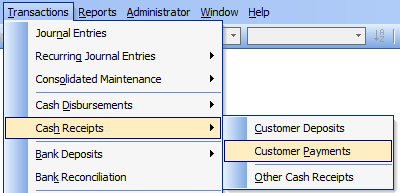
To access the Customer Payments forms, go to Transactions, Cash Receipts and select Customer Payments in the menu or click the Customer Payments hyperlink in the white area of the My Desktop General Ledger folder.
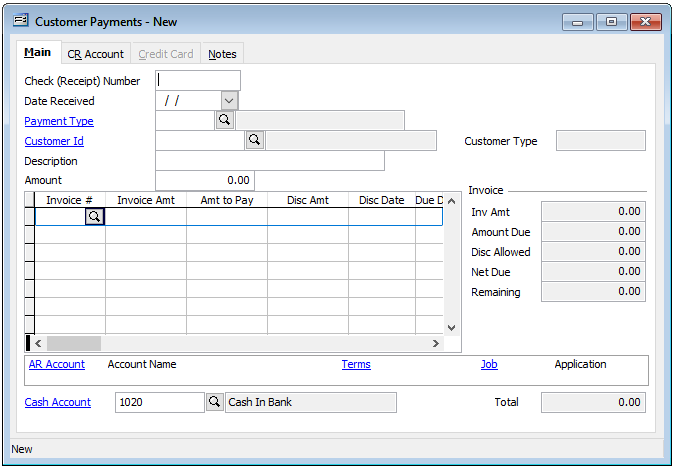
Note: Field Descriptions are listed at the end of this document.
Entering a Payment
Starting by entering the Check (Receipt) Number, Date Received, Payment Type and Customer Id. Related customer information will populate the corresponding fields.
Next, a description may be added to assist with any special information pertaining to the payment, if needed. The amount is then entered in the Amount field.
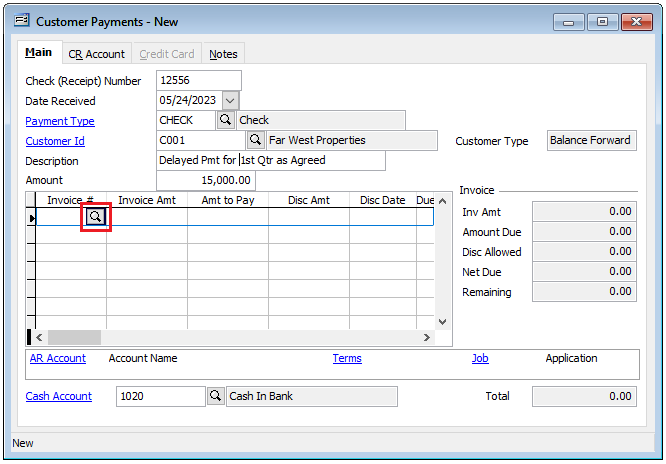
Advancing to the first Invoice # field, enter or select the first invoice you wish to apply the payment to, the Tab or Enter keys will advance to the “Amt to Pay” field and auto-populate with the current amount due which may be modified before advancing to the next line.
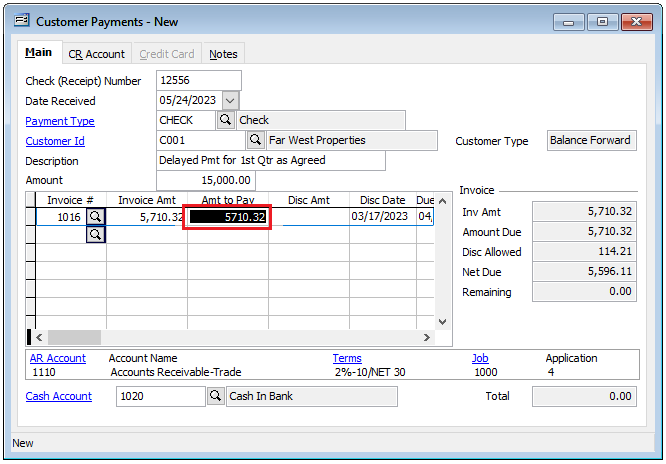
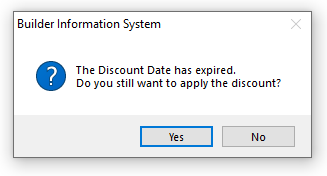
If a discount is due, it will apply the amount to the “Disc Amt” field. If the Discount Date has expired, a prompt will appear with the option to still apply the discount. Click “Yes” to apply or “No” to the leave the discount amount zero.
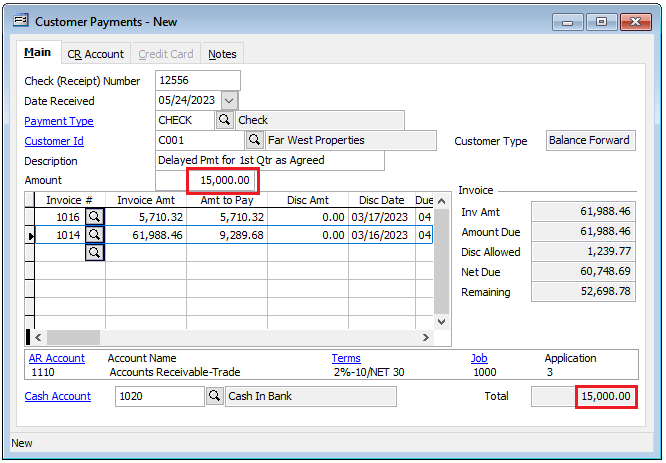
If the payment is to be applied to another invoice, enter, or select the next invoice on the next line and repeat the steps.
Once all the invoices have been selected, verify that the Total field and the Amount field match to ensure the transaction in balance.
Note: The Cash Receipts account may be changed on-the-fly on the CR Account tab, if needed, prior to saving the transaction.
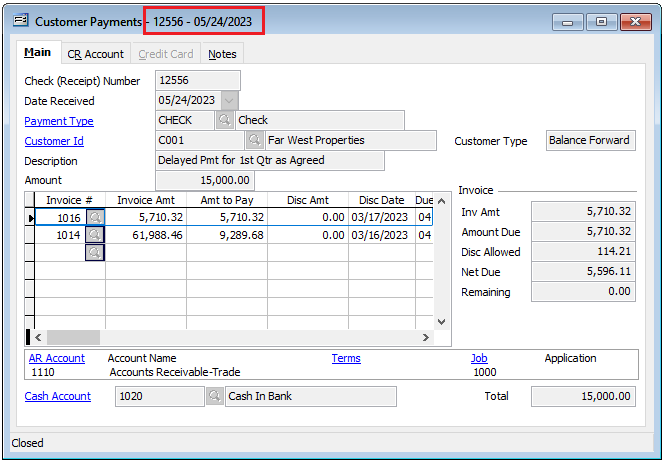
Save the Customer Payment by either clicking the “Save” icon or Ctrl + S key stroke. The Check Number and Date will appear in the transactions title bar.
Field Descriptions:
Check (Receipt) Number
Records a number that will be used to identify this record. Again, a customer payment may be applied to multiple invoices during one transaction.
Date Received
Records the date that this payment is being applied. This date may be typed or entered using the Calendar tool.
Payment Type
Payment Type selected may indicate the type of payment received and may also select an alternate Cash Receipts account via the Payment Type master record selected.
Customer ID
Records the customer identification number related to this record. The customer ID may be entered manually or by using the Find tool but must be on file in the Customers master file. Once entered, the customer’s name and type will be displayed and all outstanding invoices for that customer will appear available to select when using the Invoice # magnifying glass.
Description
Records a general description for this transaction. This is an alphanumeric field limited to 30 characters.
Amount
Records the amount of the payment to be applied to invoices at this time.
Customer Type
Displays the type established in the Customers master record for this customer.
Invoice # Column
Records the number of the invoice that will be credited by the payment selected. This may be typed or entered using the Find tool. Either sales invoices or contract invoices may be chosen.
Invoice Amount Column
Displays the total amount of the invoice selected.
Amount to Pay Column
Records the amount from the deposit selected that will be applied to this invoice.
Discount Amount Column
Displays the amount of the discount allowed for the customer invoice selected if payment is made by the discount date.
Description Column
Records a brief description for the transaction line item. Entering a concise description can save time otherwise spent looking for the original document to determine why an entry was made. This is an alphanumeric field limited to 30 characters. To record an extended description for this item, click the button to open a Notes box, where unlimited information related to this line item may be stored.
Report Code Column
Used to record a report code related to the line item, which can be used for creating customized reports. Report codes are maintained in the Report Codes file. This code may be typed or entered using the Find tool.
Job Column
If the account number selected for the line item has been assigned a Job Cost type, the button in this column will open the Job Cost screen, where the item can be posted to a specific job, change order, and cost code.
Deposit Balance
Displays the balance of the deposit selected.
Deposit Remaining
Displays the amount of the deposit remaining after being applied to the invoice(s) selected.
Invoice Discount Due
Displays the date by which the invoice selected must be paid by the customer in order to receive the discount.
Invoice Due Date
Displays the date by which the invoice selected must be paid by the customer before it is considered past due.
Invoice Discount Allowed
Displays the amount of the discount allowed if the invoice is paid by the customer before the discount date.
Invoice Amount Due
Displays the total amount due for the invoice selected, less any discounts allowed.
Invoice Remaining
Displays the amount remaining for the invoice selected, which is the amount due less any payments made.
Posting and Invoice Summary
This section displays a summary of information related to the posting of this invoice. The general ledger account number and name to which this payment will be posted are displayed. Also displayed are the payment terms for this invoice, and the related job and application for payment numbers, if applicable.
Deposit Account
Displays the deposit account to be used for posting this payment. The default deposit account is set up in the System Wide Parameters, but can be changed on the AD Account tab.
Account Name
Displays the account name associated with the account number selected.
